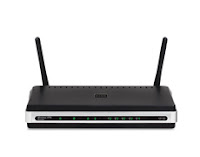
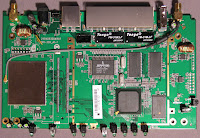
 Update guide for DIR-320
This entry will guide you through the flashing of DIR-320 to DD-WRT firmware. The DIR-320 uses a Broadcom chipset and they have relatively easy way of flashing. No more messy RedBoot, just use your system and TFTP the firmware in two seconds after powering up the DIR-320.
It is important to be patient with the flashing as the system doesn’t give any output unless you have a console cable hooked up to the DIR-320. I would say that giving the DIR-320 ten minutes is more than enough for it to do the self flashing.

Lets proceed with the flashing guide.
Required files
1. DD-WRT v24 standard generic bin file
Renaming the file
Rename the downloaded bin file to “firmware.bin” and save it on your C: drive.
Preparing the system
Set your computer to use the IP Address 192.168.0.10, subnet mask 255.255.255.0. Connect an ethernet cable between your computer’s ethernet port and DIR-320’s LAN Port 1. The status of the ethernet port (on your PC) should show the link as disconnected.
Preparing to flash
Launch your command prompt and go to your C: and prepare the command to flash but do not press key at this point of time.
Microsoft Windows XP [Version 5.1.2600]
(C) Copyright 1985-2001 Microsoft Corp.
C:\Documents and Settings\shadowandy> cd c:\
C:\> tftp -i 192.168.0.1 put firmware.bin
If you are using a Linux system you can use rexmt to simplify the process! (thanks Hung and Leon)
$ cd /path/to/firmware.bin/directory
$ tftp
tftp> binary
tftp> trace
tftp> rexmt 1
tftp> connect 192.168.0.1
tftp> put firmware.bin
Powering up the DIR-320
Remember that you need to hit on the previous command “tftp -i 192.168.0.1 put firmware.bin” at around two seconds after powering up the DIR-320 (or when the ethernet link is up). If the system accepts your firmware, the LAN1 LED will be blinking rapidly and the command will go away in less than 30 seconds. If you miss that timeframe, the command will simply hang there for quite some time. Simply repeat this process by power cycling the DIR-320 and then tftp-ing the firmware.bin in.
Do remember to give the DIR-320 around 10 minutes for the flashing. While waiting, make a cup of coffee and enjoy it before going on to the next section. You will know the flashing is successful when a new SSID “dd-wrt” appears on your wireless list.
Accessing the DD-WRT web interface
After the successful flash, set your system to be on DHCP and surf on to http://192.168.1.1. Username and password for the web interface is “root” and “admin” respectively (without the quotes).
If you still see the D-Link’s web interface, repeat the flashing procedure from the section “Preparing to Flash”. Have fun!
It is important to be patient with the flashing as the system doesn’t give any output unless you have a console cable hooked up to the DIR-320. I would say that giving the DIR-320 ten minutes is more than enough for it to do the self flashing.

Lets proceed with the flashing guide.
Required files
1. DD-WRT v24 standard generic bin file
Renaming the file
Rename the downloaded bin file to “firmware.bin” and save it on your C: drive.
Preparing the system
Set your computer to use the IP Address 192.168.0.10, subnet mask 255.255.255.0. Connect an ethernet cable between your computer’s ethernet port and DIR-320’s LAN Port 1. The status of the ethernet port (on your PC) should show the link as disconnected.
Preparing to flash
Launch your command prompt and go to your C: and prepare the command to flash but do not press
Microsoft Windows XP [Version 5.1.2600]
(C) Copyright 1985-2001 Microsoft Corp.
C:\Documents and Settings\shadowandy> cd c:\
C:\> tftp -i 192.168.0.1 put firmware.bin
If you are using a Linux system you can use rexmt to simplify the process! (thanks Hung and Leon)
$ cd /path/to/firmware.bin/directory
$ tftp
tftp> binary
tftp> trace
tftp> rexmt 1
tftp> connect 192.168.0.1
tftp> put firmware.bin
Powering up the DIR-320
Remember that you need to hit
Do remember to give the DIR-320 around 10 minutes for the flashing. While waiting, make a cup of coffee and enjoy it before going on to the next section. You will know the flashing is successful when a new SSID “dd-wrt” appears on your wireless list.
Accessing the DD-WRT web interface
After the successful flash, set your system to be on DHCP and surf on to http://192.168.1.1. Username and password for the web interface is “root” and “admin” respectively (without the quotes).
If you still see the D-Link’s web interface, repeat the flashing procedure from the section “Preparing to Flash”. Have fun!


